All editions of CompleteFTP implement auto-banning, though it can only be customized in Professional and Enterprise MFT. Additionally, Professional and Enterprise MFT support IP filtering.

Auto-banning is an important feature related to IP filtering that helps secure the server. It works by automatically banning IP addresses from connecting if they have failed to authenticate a certain number of times within a time period. Bans last for a specified duration, or until the CompleteFTP service is restarted. If you wish for the duration of bans to last until the service is restarted then select the 'Duration of ban' property and then click the x button at the right.
For example, using the default settings, if a rogue client is attacking from a given IP address, and fails to guess a password correctly 10 times within a 5 minute (=300 second) period, their IP address is banned from connecting for the next hour. After an hour has elapsed, the ban is automatically lifted.
The auto-banning settings are configurable, although it is generally advisable to use the defaults.
The currently banned IP addresses can be viewed in the Monitoring panel. Bans can be removed or made permanent from this panel.
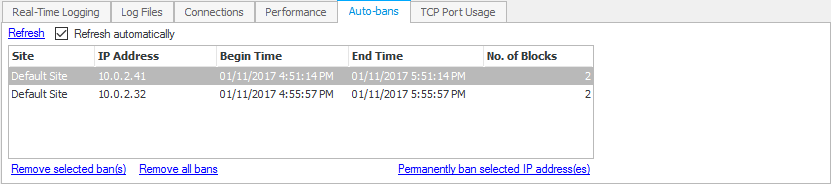
Note that auto-bans are not persistent - if the service is restarted, all bans are lost (unless they are made permanent via the Monitoring panel).
Auto-banning can be disabled for specified IP addresses using an allow-always IP filter-rule (see below). Clients connecting from IP addresses that fall under an IP filter-rule whose action is allow-always will be immune from auto-banning. This is especially helpful in situations where many clients are connecting from a single Internet IP address since it stops a single 'misbehaving' client from causing all other clients to lose their ability to connect.

CompleteFTP's IP filtering is very flexible and may be used to implement many different policies. The following step-by-step guides are available:
An IP filter consists of a collection of rules. Each rule consists of a mask and an action. The mask specifies which IP addresses the rule pertains to and the action specifies what should be done. Each rule also has a scope that is either the entire site or a specific user.

The mask may be:
123.123.123.123, 2001:db8::).10 (all addresses starting with 10),
172.16 (all addresses starting with 172.16),
192.168.1 (all addresses starting with 192.168.1).
192.168.2.100-150.all (or a blank mask), meaning all addresses.example.com).LAN).There are three possible actions - deny, allow and allow-always. Deny will block access from clients whose IP addresses are included in the mask. Allow will permit access, unless the auto-banning system has detected too many failed login-attempts (see above). Allow-always is like allow except that auto-banning is disabled.
Rules are combined to filter incoming IP addresses. When a connection attempt is made, the rules are consulted to see if the remote IP address matches the rules, and the connection is dropped if it is determined that access should be denied.
The precedence of operations is important. By default, the precedence is Deny over allow. This means that if all IP addresses are allowed, and there is a deny rule for a specific address or range, then the deny rule takes precedence and any IP address matching the deny rule is denied. Allow over deny is the other option, which means if an IP address matches an allow rule, then it will be permitted access even if it is listed in a deny rule.

Each rule may optionally be associated with a user. If it is associated with a user then it applies only to that user. If it's not associated with a user then it applies to the entire site. Typically user-specific rules are used in the following scenarios: