
Use this type of extension to implement any IP filtering scheme required. IP filtering is used to deny or allow access by specific IP addresses or ranges of IP addresses. CompleteFTP offers two inbuilt filtering schemes, auto-banning and rule-based, so a custom IP filter extension need only be implemented if neither of these schemes satisfy requirements. Examples of other types of IP filtering that could be implemented include:
Sample code for both of these are provided below.
General instructions on building CompleteFTP JSS extensions may be found here.
An IP filter extension must implement a single Javascript function with the signature:
function getFilterAction(ipAddress)The ipAddress is a string containing the IP address. The function must return one of the following data-types:
There are many geo-location web-services available, as well as free ones such as ipstack.com. This web-service will return geo-location data for an IP address in response to a simple HTTP GET request, of the format which is set to JSON, then a JSON object is returned which includes a field, country_code, which is the two-letter code of the country in which the IP address is located. To filter by country, we just need to check this field. If we wish to only allow access from, say Australia, then we just need to verify that the country_code is AU. This can be done by the following code:
function getFilterAction(ipAddress) {
    var accessKey = "Insert IPstack access key here";
    var geoData = http.json("http://api.ipstack.com/"
        + ipAddress + "?access_key=" + accessKey + "&format=1");
        return geoData.country_code == "AU";
}
The http.json function makes a HTTP request to a given URL, parses the (JSON) response, and returns it as a Javascript object. Note that connections from localhost are always allowed.
It's a good idea to provide a reason, so that the logs show why a connection was denied. This may be done as follows:
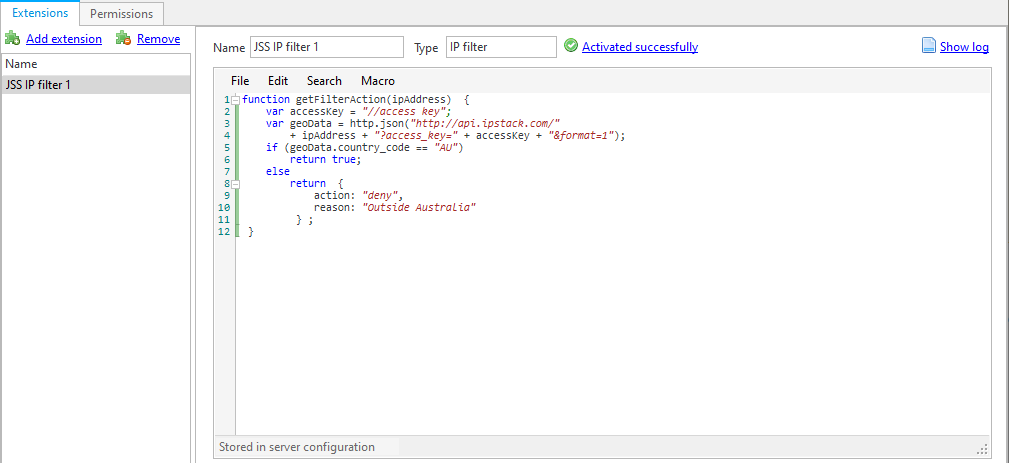
function getFilterAction(ipAddress) {
    var accessKey = "Insert IPstack access key here";
    var geoData = http.json("http://api.ipstack.com/"
        + ipAddress + "?access_key=" + accessKey + "&format=1");
    if (geoData.country_code == "AU")
        return true;
    else
        return {
            action: "deny",
            reason: "Outside Australia"
        };
}
Note that:
The following shows you how to apply the code above:


One of the attacks most commonly observed in logs, is the password attack. This involves trying to log in using commonly used user-name/password combinations. Some of the most common user-names are root, admin and Administrator, so it makes sense to automatically disallow any IP addresses from which login-attempts employing those user-names have been made.
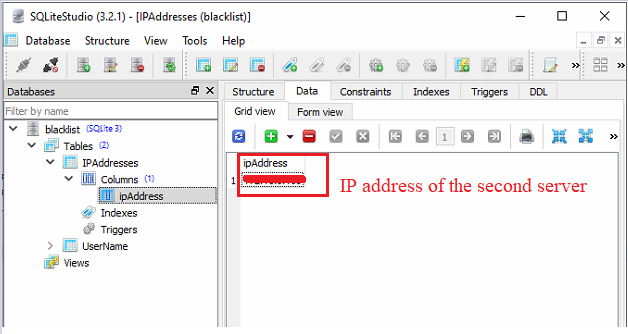
To implement this in JSS we need storage for our user-name blacklist and also for our list of IP addresses that have used the blacklisted user-names. An SQLite database is an easy option as it's lightweight, stores data in a single file and the required driver is included with CompleteFTP. The database must have two tables:
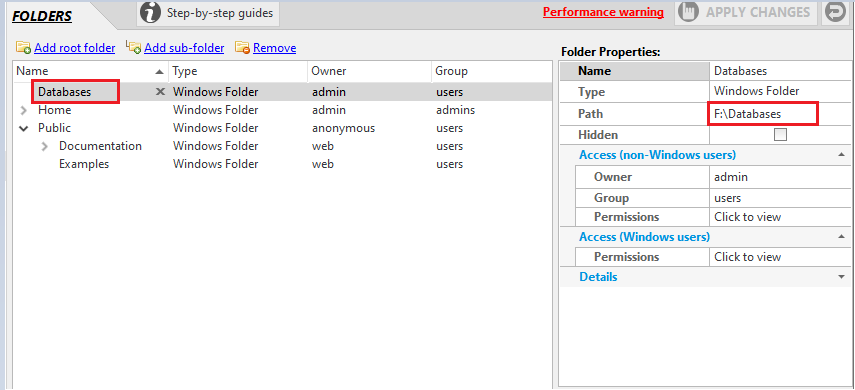
An SQLite database stores its data in a single file, so we must specify the place where this file is stored. In the code below, it's assumed that a folder has been created at /Databases in the virtual file-system and that this folder maps to a suitable location in the Windows file-system.
Assuming that the IPAddresses table contains all the IP addresses from which clients have tried to authenticate using blacklisted user-names, the following IP filter extension code will block connection attempts from those IP addresses:
function getFilterAction(ipAddress) {
    if (isIPAddressDenied(db, ipAddress))
        return {
            action: "deny",
            reason: "previously used blacklisted user-name"
        };
    else
        return true;
}

function isIPAddressDenied(db, ipAddress) {
    var dbFile = system.getFile("/Databases/blacklist.sqlite3");
    if (!dbFile.exists())
        return false;
    else {
        db = system.openDatabaseSync(dbFile.fullPath);a
        var found = false;
        db.readTransaction(function(tx) {
            var res = tx.executeSql("SELECT * FROM IPAddresses WHERE ipAddress = ?", [ipAddress]);
            found = res.rows.length > 0;
        });
        return found;
    }
}
The isIPAddressDenied function first checks to see if the database file exists, if it doesn't, then it returns false to indicate that the IP address is not banned. If the database file does exist, then it opens it and queries the IPAddresses table for the given IP address, and returns true if it finds it there.
The following is the way in which to apply the code shown above:


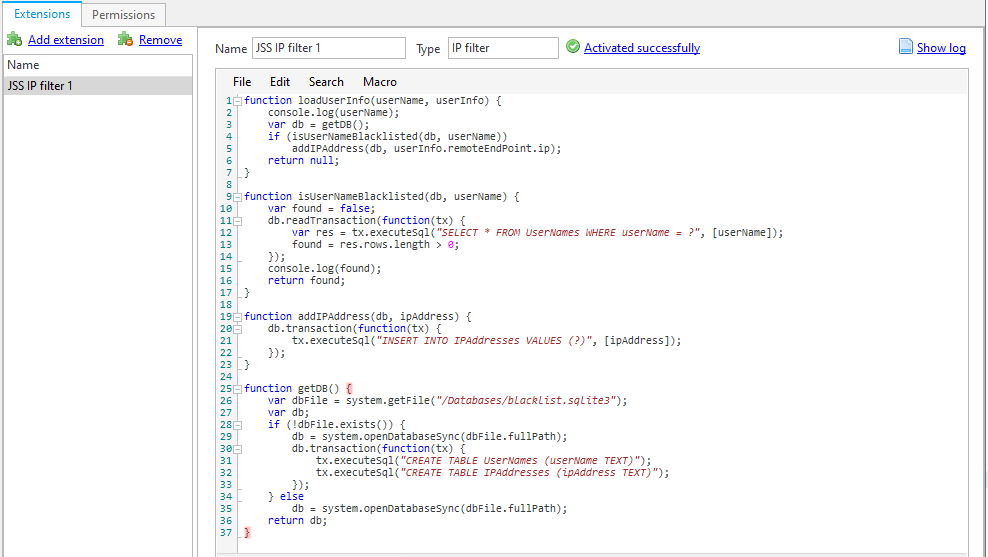
Since IP filters don't see the user-names associated with incoming connections, we need an authentication extension to check the user-name against the blacklist, and add the IP address of the client if the user-name is found there. The following code achieves this:
function loadUserInfo(userName, userInfo) {
    console.log(userName);
    var db = getDB();
    if (isUserNameBlacklisted(db, userName))
        addIPAddress(db, userInfo.remoteEndPoint.ip);
    return null;
}

function isUserNameBlacklisted(db, userName) {
    var found = false;
    db.readTransaction(function(tx) {
        var res = tx.executeSql("SELECT * FROM UserNames WHERE userName = ?", [userName]);
        found = res.rows.length > 0;
    });
    console.log(found);
    return found;
}

function addIPAddress(db, ipAddress) {
    db.transaction(function(tx) {
        tx.executeSql("INSERT INTO IPAddresses VALUES (?)", [ipAddress]);
    });
}

function getDB() {
    var dbFile = system.getFile("/Databases/blacklist.sqlite3");
    var db;
    if (!dbFile.exists()) {
        db = system.openDatabaseSync(dbFile.fullPath);
        db.transaction(function(tx) {
            tx.executeSql("CREATE TABLE UserNames (userName TEXT)");
            tx.executeSql("CREATE TABLE IPAddresses (ipAddress TEXT)");
        });
    } else
        db = system.openDatabaseSync(dbFile.fullPath);
    return db;
}
The loadUserInfo function is called, when authentication of a user is required, as described in the section on Simple JSS Authentication Extension. isUserNameBlacklisted queries the database to see if the given user-name is in the blacklist. addIPAddress adds the given IP address to the list of banned IP addresses, which is the list that the associated IP filter extension checks (above). The getDB function checks to see if the database has already been created. If it has, then it opens it and returns an object that can be used to access it. If it hasn't then it creates it as well as the required tables.
Adding user-names to the blacklist can be done with a SQLite editing tool such as DB Browser for SQLite, or alternatively a JSS web-app could be developed that provides a way to do this.
To apply this example, a user can follow the steps below:


