Single Sign-On (SSO) is a concept in which multiple systems delegate authentication of users to a single authentication server. The main advantage of this is that accounts for access to many systems may be maintained in a single system. Since many different systems need to communicate, a standards-controlled protocol is required.
One of the most common SSO protocols is SAML (Security Assertion Markup Language). SAML involves three parties: a normal web-browser, a Service Provider (SP) and an IDentity Provider (IDP). The SP is the web-server that the person using the browser wants to access, and the IDP is the server on which the person has an account.
The basic assumption of SAML is that there is a trust-relationship between the SP and the IDP. In particular, the SP trusts the IDP when the IDP says that the client is allowed to log in. This relationship is established through the exchange of SSL certificates wrapped up in packages referrred to as metadata. The SP must almost always have the IDP's metadata installed before it can accept connections, so that it can verify messages from the IDP. The IDP doesn't always require the SP's metadata as it doesn't itself expose sensitive data. The exchange of metadata must happen before logins are possible.
CompleteFTP (Enterprise MFT only) can be configured as a SAML SP. This means that it can delegate authentication to a IDP. It can't itself act as an IDP.
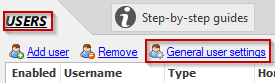
SAML is configured in the Other Authenticators section of the General User Settings dialog, which is accessible from the Users panel.
The first step in configuring SAML in CompleteFTP is to enable the SAML authenticator in the Other authenticators section of the General Users Settings dialog.
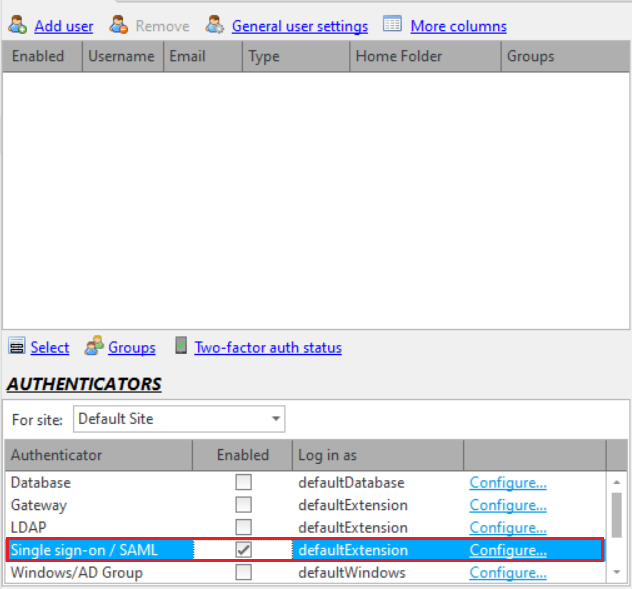
After this, click the Configure link to open the SAML Single Sign-On Configuration dialog.

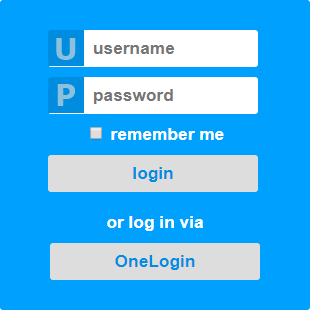
The first step in configuring SAML is to add the IDPs. For each added IDP, a button will be added to CompleteFTP's login form.
IDPs are added using their metadata. The IDP's metadata must be either downloaded from the IDP server or sent by the IDP's administrators. Once received it must be added to the configuration by clicking the 'Add IDP' link, which allows for reading from a file or for direct download from a website.
After adding the IDP metadata the name must be entered. This name will appear on the IDP's button on the login page, as shown below:
In addition to the name, three other attributes may be defined for an IDP:
As mentioned above, the IDP tells CompleteFTP that it's safe to give access to a user by means of a SAML assertion. SAML assertions are digitally signed using the IDP's private key, allowing CompleteFTP to verify their origin using the IDP's certificate, which is included in the IDP's metadata. An additional level of security can be added by validating the IDP's certificate against the Windows Certificate Store.
If the checkbox labelled 'Validate certificates against the Windows Certificate Store' is ticked then the IDP's certificate will be verified against the Windows Certificate Store every time a SAML assertion is received. The main condition for a certificate to be considered valid is that the certificate of the Certificate Authority (CA) that issued it is installed in the Trusted Root Certification Authorities store for the machine in the Windows Certificate Store. This can of course only be done if the certificate was actually issued by a CA in the first place, which is often not the case.
The validation option is off by default placing the onus on the administrator who adds the IDP's metadata to make certain that the metadata is from the intended source. This can usually be done by downloading it over an HTTPS connection directly from the IDP website. If there's any doubt then the validation option should be enabled.
Some IDPs require the SP's metadata. The SP metadata is available for download from CompleteFTP at the URL that's presented when the 'Save SP metadata' link is clicked. The metadata won't be correct until (1) the site's URL has been set, (2) the administrative contact details have been filled in, and (3) the SAML configuration has been applied to the server.
The site's URL is the URL that users will be directed back to after they're successfully authenticated, so it must be a URL that resolves to root directory of the CompleteFTP server. It's important that the correct protocol is used; usually it will be HTTPS. Note that if your site is configured to use a non-standard port (80 for HTTP and 443 for HTTPS) then the site URL must include the port number (e.g. https://mydomain.com:1443).
The SAML configuration is stored in XML. A means of editing the XML directly is provided in case customizations other than those presented by the configuration form are required. This should usually not be attempted unless instructed to do so by EnterpriseDT support.
CompleteFTP supports group claims and a custom attribute called 'group', which allows group membership to be controlled from the IDP. The values of the group claim and the group custom attribute are matched against the names of CompleteFTP groups and where there's a match the authenticated user will be a member of that group. For convenience, the value of the custom group attribute may be a comma-separated list, but since both the group claim and the custom attribute are arrays, multiple groups may also be specified as distinct elements in the array of values.
Once SAML has been configured and applied to the server, go to the CompleteFTP login page. There should be an additional button labelled with the name of the IDP. Click this button to login via the IDP. Check the real-time log in case of errors.
Note that there are many different implementations of the SAML protocol and there's a chance that your version of CompleteFTP is incompatible with some of them. Please contact support if you're unable to get an IDP to work with CompleteFTP.